Adding Solar to your Boat
- Michael Garretson
- Nov 21, 2022
- 16 min read
Updated: Dec 27, 2024

When it comes to making sure your boats batteries are charged while on the water or on a mooring, solar charging systems have become by far the best option.
Since solar panels are available as both hard and flexible panels, there are many mounting options available when it comes to designing a system that meet your power requirements, while maintaining the look and aesthetics of your boat.
With anything related to boats, there are always compromises and tradeoffs that come into play, especially when it comes to solar charging systems. This article is hopes to address and answer some of the questions to help you determine which system and installation method might be right for you and your boat.
Solar Panel Options
Rigid Panels
Rigid solar panels have been around since the early days of solar technology. With real-world efficiency ranging from 16-24%, a long lifespan often exceeding 20 years, and a cost of $0.50-$2.00/watt, they typically offer the best value in terms of cost per watt. Built with an aluminum frame and a protective glass cover over the solar cells, rigid panels are commonly chosen for boats when mounting on solar arches, dinghy davits, or lifeline rails. These mounting setups are often more compatible with rigid panels, which are also more durable and cost-effective than flexible alternatives.

However, rigid panels do have downsides. They are heavier, delivering about 7 watts/lbs, can’t be walked on, and are vulnerable to damage from overhead hazards, like seagulls dropping shells. Larger rigid panels may also incur higher shipping costs equal to the price of the panel if you're unable to find a local supplier.
When selecting rigid panels, there are generally three types to consider: standard, bifacial panels, and half-cut panels. Bifacial panels are a relatively new option, offering about 18% higher efficiency than standard panels. They capture light from both sides, allowing them to take advantage of reflections from the water or deck, and additionally perform better in low-light conditions. Even when installed in a way that partially blocks the underside, they can still yield up to 5% more efficiency than standard panels.
While bifacial panels may appear to be the superior choice, standard panels remain the most popular, especially in the marine market. Standard panels are generally available in more sizes, are widely accessible, and are often more affordable, making them a practical choice for many boat owners.
Half-cut solar panels are based on traditional crystalline solar cells but differ in that the cells are cut in half with a process called cleaving, allowing the cells to deliver the same voltage but at half the current. This benefits the panel by increasing tolerance to partial shading, reduces hot spots, and increases efficiency of 2%-4% by reducing electrical losses with a lower current. For boat installations, these panels are fantastic due to their ability to withstand partial shading, which is always a major concern on marine solar systems. It should be noted that half-cut panel technology can be applied to bifacial panels.
Semi-Flexible Panels
Semi-flexible solar panels have become popular in the marine world due to their versatile mounting options and streamlined appearance. While they’re typically less efficient than rigid panels, with efficiencies between 13-17% and a power to weight ratio of 25w/lbs, they offer unique benefits, such as the ability to be walked on if mounted to a deck, or seamlessly integrated into marine canvas without needing additional frame support or stainless steel fabrication.
Semi-flexible panels generally fall into two categories: "Budget" and "Top-Tier." The price difference between them is significant, driven by construction & material quality, as well as warranty terms. Budget panels from brands like Renogy, Lensun, EcoFlow, and Topsolar typically range from $1.30-$1.60 per watt. These are often a good choice when integrating with mid-life marine canvas as their lifespan aligns with that of the canvas materials such as sunbrella. While top-tier panels may offer superior construction, panels on canvas are often subject to bending fatigue, which we have found limits their lifespan in a similar fashion to budget panels.
Top-tier panels from companies like Solbian, Solara, Merlin, Sol-Glo, and Xantrex are built with high-quality silicon cells and often incorporate advanced technologies like MTAT, MTW, and blocking diodes, improving lifespan, reliability, and efficiency. These high-end panels cost between $3.50-$5.00 per watt, and deliver added performance and longevity.
Regardless of the brand or cost, semi-flexible panels do have some drawbacks, particularly in terms of lifespan. Depending on mounting style and panel quality, most semi-flexible panels last between 5 and 10 years, but if improperly mounted, can fail in under 2 years. We often recommend budget panels for canvas installations on a budget, but for deck-mounted installations, investing in top-tier quality is critical, and can save significant time and effort down the road if a manufacturing defect causes the panels to stop working.
Budget is, of course, an important consideration for most boating projects, but it’s important to choose a reputable, established manufacturer at any price point.
Several specific issues can further reduce the lifespan of semi-flexible solar panels, so understanding these pitfalls is essential if you’re considering them for your boat.

Excessive Bending: Most semi-flexible panels are rated for a maximum flex of 30 degrees. Bending past this limit can lead to cracked silicon cells and broken internal wiring, which severely compromises panel functionality. Panels are particularly vulnerable when bent inward, as the silicon cells are more prone to damage under compression.

Microcracks: Seen most often with marine canvas installations, excessive vibration and movement can create a phenomenon called microcracks in the silicon cells. These microcracks reduce output over time and, if left unchecked, can significantly impact the panel’s maximum efficiency. Deck-mounted panels are far less susceptible to this type of failure. For canvas-mounted panels, keeping the canvas taut and securing the panel firmly can help reduce vibration-induced damage.

Delamination: Delamination is one of the most visible forms of failure and often appears as a translucent white bubble on the panel's surface. This issue typically results from water intrusion and is exacerbated by heat, which creates vapor pressure within the panel. Causes of delamination can include improper manufacturing, damage at grommets or panel edges, and stitching through the panel (e.g., to affix Velcro or zippers). For canvas installations, we have found using adhesive products to attach velcro or zippers to be more reliable than sewing into the panels and reduce the chance of delamination.

UV Degradation: Unlike rigid panels made with glass, flexible panels use plastic materials that become hazy with prolonged UV exposure. This issue is especially common in budget panels. To maximize lifespan, avoid allowing salt buildup on the panels and opt for ETFE-coated panels over PET-coated ones, as EFTE is significantly more UV-resistant.
Temperature Issues: Flexible solar panels are notorious for their inability to shed heat, as their solar cells are installed between two insulated layers. Excess heat can cause hotspots, accelerating UV degradation, delamination, and microcracking due to extreme temperature fluctuations. As blocked cells can consume power from other cells, even bird poop can cause excess heat generation leading to hot spot issues. Additionally, cell damage and micro cracks can contribute and cause hot spot issues, further compounding the issues leading to combustion in rare cases. While limited, ways to reduce this issue include using higher-quality panels, proper handling, ensuring they are kept clean, and checking periodically for any cell damages.
ETFE vs. PET

Semi-flexible solar panels generally fall into two main construction types: ETFE (ethylene tetrafluoroethylene) and PET (polyethylene terephthalate). ETFE, a fluorine-based plastic, is quickly becoming the preferred choice due to its superior mechanical properties compared to PET.

ETFE panels offer enhanced UV transmittance, chemical resistance, resistance to dirt accumulation, and temperature tolerance, among other advantages. PET panels are also notorious for developing discoloration and cloudiness over time, further reducing efficiency over time. The only notable drawbacks are a higher cost than PET panels and potentially increased heat buildup due to their all-black design. We highly recommend choosing ETFE panels for all marine installations whenever possible.

Performance of ETFE vs PET
Material | ETFE | PET |
Combination | Ultra lightweight and durable. The combination between ETFE and back sheet is much stronger than PET. | Combination of PET and back sheet cracks easily, is not durable, and also not waterproof. |
Thickness | Includes a 0.025mm thin, UV resistant, layer of protection. Total thickness less than 0.1mm. | 0.15mm thick. Solar cells break easily due to low hardness. |
Light Transmission | 95% transparency offers excellent efficiency in terms of light to electricity conversion. | 90% to 93% transparent results in lower efficiency in terms of light to electricity conversion. |
Surface Adhesion | ETFE has non-adhesive surface properties. Highly stain-resistant and easily gets cleaned by the rain. | Adhesive surface often gets covered with dust or other debris, significantly affecting the output of solar panel. |
Lifetime | Lifetime of 10 years. Resists aging, deteriorates slowly. | Lifetime of at most 5 years. Easily forms air pockets and peels off. |
Corrodibility | Highly resistant to seawater corrosion. | Not acid and alkali resistant, making it totally unsuitable for use in marine environment. |
Flammability | Highly flame retardant. Suitable for use in temperatures ranging from -65°C to +150°C. Can be installed safely in hot climates. | Not suitable for use in high temperature regions due to short-term heat resistance. |
Light Reflection | Absorbs sunlight. Does not reflect it. | Reflects a large amount of sunlight, producing glare and creating traffic risks to cars and airplanes. |
Flexible CIGS Solar Panels
While still uncommon in the marine industry, no discussion of solar panels would be complete without mentioning CIGS thin-film solar panels. CIGS, which stands for copper, indium, gallium, and selenide, represents a new and promising solar technology with potential to make a significant impact. These fully flexible solar cells could offer higher efficiency than current semi-flexible panels, improved temperature performance, a lower carbon footprint, and reduced production costs. As this technology advances, it could lead to even greater integration of solar charging systems on boats.

Despite its promise, however, current CIGS panels may not yet be reliable enough for marine use. Until manufacturing methods are further refined to improve durability, I would be cautious about recommending any CIGS panels for boat installations.
Charge Controllers
A charge controller is a critical component of any solar installation, ensuring that the voltage from your solar panels is safely and efficiently converted to match your battery bank’s charging profile. There is a significant performance difference between the two leading charge controller types, and understanding the difference between these two is critical to ensuring you are maximizing your solar input.
There are two types of charge controllers available, being MPPT and PWM.
MPPT (Maximum Power Point Tracking)
MPPT controllers are widely regarded as the superior option for solar charging, especially on boats where space for solar panels is limited. These controllers step down the voltage from the panels while boosting the output amperage, achieving impressive efficiency levels of 94%-97%. This means more of the energy produced by your solar panels is converted into usable power for your batteries.

Though MPPT controllers come at a higher cost, the benefits often outweigh the expense, particularly for marine applications where maximizing energy harvest is crucial. Many MPPT controllers also include advanced features like Bluetooth connectivity, enabling real-time monitoring of your solar output. Brands like Victron are popular choices for their reliability and cutting-edge technology.
PWM (Pulse Width Modulation)
PWM controllers have been around for a very long time, they are cheap, and often included in most solar starter packs. PWM controllers work by essentially lowering the average voltage through a series of pulses to a

usable amount to charge a battery bank. With this type of technology, the efficiency of the controller could be as low as 50% of the solar array output, which is a big reason why we do not advise using this on marine installations.
While they are inexpensive, PWM controllers are not suitable for marine use due to their lower performance and concerns over build quality. Poorly made PWM controllers can sometimes fail to regulate voltage properly, risking overcharging and potential damage to batteries. For most boaters, investing in an MPPT controller is not only safer, more efficient choice for meeting energy demands on the water.
Monocrystalline/Polycrystalline

Used in both semi flexible and rigid panels, crystalline silicon (c-Si) technology dominates the solar industry. With differing manufacturing processes, c-Si cells can be divided into monocrystalline and polycrystalline cells. In recent years, the choice between these two technologies has become less significant, as declining monocrystalline prices have erased its primary cost disadvantage.
Monocrystalline: Known for their sleek black appearance, monocrystalline cells are made from a single silicon crystal. This solid crystal structure allows for better electron flow, resulting in higher efficiency and a more compact panel size. Although traditionally more expensive than polycrystalline, increased global production has reduced costs, making monocrystalline panels the preferred choice for most marine solar systems. With efficiencies over 20% (depending on the manufacturer), monocrystalline panels also perform better at higher temperatures.
Polycrystalline: These cells are composed of multiple silicon fragments fused together and can be recognized by their blue-purple crystalline pattern. Polycrystalline cells are generally more environmentally friendly to produce, as most of the silicon material is used with minimal waste. However, their lower silicon purity leads to lower efficiency, typically around 15-17%, and reduced heat tolerance compared to monocrystalline, which can be a drawback during hot summer months on the water.
Solar Cell Selection
Whether you choose rigid or semi-flexible panels, the type of solar cell used in the panel’s construction plays a crucial role in determining the panels output and efficiency and is often the primary driver of price differences.
Without diving into technical details, PERC (Passivated Emitter and Rear Contact) cells are an enhanced version of standard solar cells and generally deliver 6-12% higher efficiency. IBC (Interdigitated Back Contact) cells, often marketed as Maxeon, go a step further, offering about 20% more efficiency than PERC cells and reducing the main causes of cell failure, such as breaks in the cell or electrical connections. While these high-efficiency cells come at a premium, the choice ultimately depends on your power requirements, budget, and the available space on your boat.
Understanding Solar Panel Specifications
Solar panel specification is important when determining how a PV system will be wired, in addition to the correct fuse selection. While many panels give

Maximum Power (Pmax): The peak power output the solar panel can achieve.
Solar Panel Efficiency: The percentage of sunlight the panel converts into usable electricity.
Temperature Coefficient: Indicates how the panel's performance is affected by temperature changes. This is represented as the percent decrease for each degree of temperature rise.
Open Circuit Voltage (Voc): The voltage output measured when no current is flowing through the panel. This reading is measured at the unconnected terminals to test or check panels.
Short Circuit Current (Isc): Measures the current generated when the positive and negative terminals of a solar panel are directly connected. It represents the maximum current the panel can produce without sustaining damage and helps determine the safe amperage the panel can handle when connected to a load. Power Tolerance: Indicates the range within which a solar panel's actual power output may vary from its rated capacity. For a 100 watt panel with a -3%/+3%, the power tolerance could vary between 97 - 103 watts.
Dimensions: The physical measurements of the panel, including length, width, and thickness.
Certifications: High-quality solar panels are subjected to extensive testing under different environmental conditions to verify their performance and safety. These certifications are typically listed on the panel's specification sheet. Industry-standard tests and certifications are governed by organizations such as the International Electrotechnical Commission (IEC) and Underwriters Laboratories (UL).
Weather Ratings: The panel’s ability to endure specific wind and snow loads, ensuring durability in various weather conditions.
How many watts do I need?
To calculate your solar requirements, a common conservative approach is to match your daily energy needs (determined by a power audit) with a solar setup capable of producing full output for at least three hours per day. For example, a 100-watt panel, generating around 8.3 amp-hours per hour, would yield about 25 amp-hours daily. This approach may be overly conservative for boats in sun-rich locations like the Bahamas, where more detailed calculations based on monthly average radiation values can be more accurate.
Since keeping a refrigerator running is one of the most common reason for solar installation, a good rule of thumb is to aim for a minimum of 300 watts of solar. However, the specific power requirements for refrigeration vary with the efficiency of the equipment and insulation, so calculating your actual daily energy needs is still recommended.
When determining the solar wattage needed for your boat, we generally follow the principle that “more solar is better”. Seasonal variations in sun angle and daylight hours can lead to substantial differences in daily output, and while your batteries may hold at 13.3V in July with the refrigerator running, by September you might find the system struggling to maintain 11.5V. Additional solar capacity also becomes invaluable for restoring battery charge after multiple cloudy days.

Designing your Solar Panel Array
How you connect your solar panels plays a significant role in the efficiency and their overall output onboard your boat. Each wiring configuration has its advantages, but the right choice depends on your solar array size, potential panel shading, and charger/wiring limitations.
Parallel Connections: In a parallel configuration, the positive leads of all panels are connected together, as are the negative leads, typically using branch parallel adapters. This setup is particularly effective for boats, as shading on one panel has minimal impact on the overall efficiency of the array, unlike in a series configuration, where shading can significantly reduce output.
When calculating the electrical properties of a parallel array, the voltage of the panels remains constant, while the amperage increases with each additional panel. This increase in amperage can present challenges, as most standard solar connectors and 10-gauge solar wires are rated for a maximum of 30 amps. This limitation restricts the number of panels that can be safely connected in parallel without upgrading to thicker wires or higher-rated connectors.
Series Connections: When solar panels are connected in series, the voltages of each panel are added together, while the amperage remains the same. This configuration is ideal for larger solar arrays not subject to shading, as the solar connectors and wire will be able to handle a high overall wattage output when compared to a parallel array.
However, it is critical to understand that if one panel is shaded or damaged, the output of the entire array drops.
Individually Regulated Setups
An alternative to series and parallel configurations is using individual charge controllers for each panel. This setup prevents overloading of connectors and wires, common in parallel arrays, and offers redundancy if panels are shaded. However, it requires running additional wires (two per panel) and comes with the added cost of extra charge controllers.
Wire, Connectors, Fusing, & Additional Components
In addition to the solar panels, charge controller, and wire configuration selected, selection of proper components to complete this installation are equally important.
Solar Wire: Selection of proper solar wiring is an important consideration when putting together a system for your boat, as various solar wire comes in various insulation types, with PV wire being the preferred option due to it using stranded tinned conductors. Followed by PV Wire, USE-2 is also a good recommendation, providing additional UV protection and chafe resistance. With the use of solar connectors, referred to as MC4 connectors, the use of standard marine wire is discouraged due to the thinner insulation and higher possibility of water intrusion into the connector.
MC4 Connectors:
MC4 connectors are a specialized connector designed specifically for solar panel systems, providing a watertight locking connection suitable for the outdoor environment. These connectors can be self installed, but require a specificized crimper to ensure proper installation. Failure to properly crimp these connectors can lead to additional resistance, and in extreme situations result in fire.
MC4 connectors should be selected based on the wire gauge being used, and it should be observed that they are typically rated for 30 amps of current.

Solar Fusing: Just as any other electrical system onboard, proper fusing is an absolute requirement for marine solar systems. Proper fusing not only protects against chafe and short circuits but also protects against possible fires from a fault panel. Proper fusing for solar systems starts at the battery, where the fuse is selected for the wire gauge used to connect to the solar controller.
With regards to solar panel fuses, specifically on parallel systems, when the short circuit current of the entire array is greater than the maximum series rating listed on the panel, fuses must be installed on all parallel branches with fuse sized to max series fuse rating. When this is not the case, individual panel fuses are not required but should still have a dual pole solar disconnect below deck. Although not listed in ABYC code, these requirements called out in NEC 690.9 should be followed as best practice.
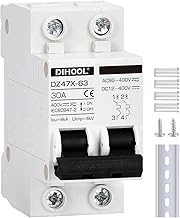
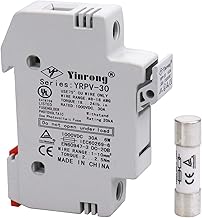
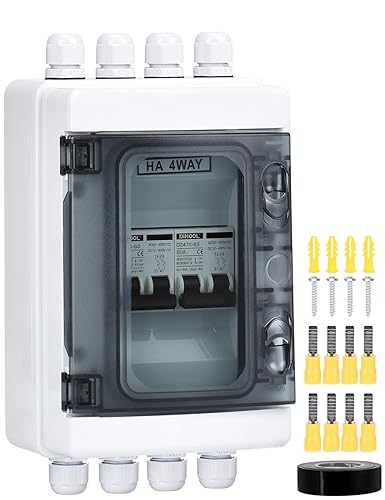
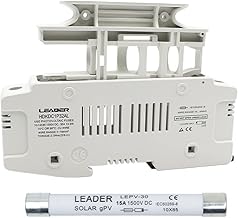
With regards to dual pole disconnects, we have found that many cheaper options available on the market have a high likelihood of internal failure onboard boats, which is why we typically opt for rotary style disconnects, or din mount fuse systems allow for easy disconnect of each pole.
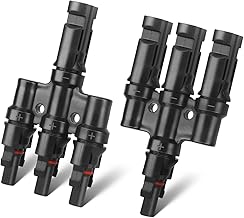
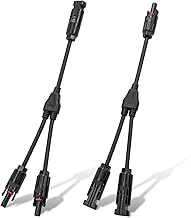
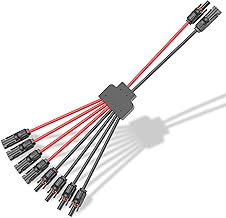
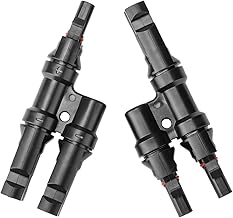
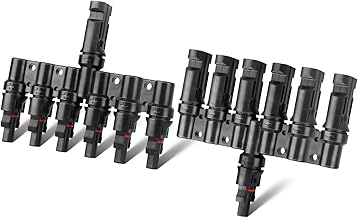
Paralleling Connectors: These devices are used to connect multiple solar panels in parallel, allowing the system to increase its overall current output while maintaining the same voltage. In a parallel configuration, the positive terminals of each panel are connected together, as are the negative terminals, effectively combining the current from each panel. This setup is particularly useful in systems as they allow for the continued use of MC4 connectors. Paralleling connectors can come with inputs connections ranging in quantities between 2 and 6 and
can have flexible whips or be rigid plastic. Even if planning on installing 6 solar panels in parallel, we often recommend and use the double Y connectors as they allow for neater wire organization for the solar wire run.

Power Optimizers: Power optimizers are designed to maximize each panel in a series configuration, and are typically reserved for the commercial or home installation. With a high rate of failure, the benefits are not worth risks when installed on a boat and should be avoided.
Mounting Options
There are multiple mounting options available for boats, and the preferred method is usually dependent on the boat type, wattage requirements, and aesthetic concerns.
Canvas Solar Integration
Integrating semi-flexible solar panels into canvas dodgers and bimini is a great way to add solar while not affecting the boat's lines or appeal from afar. With this mounting style, panel dimensions are typically the greatest concern, as many arrangements require a bit of “TETRIS” skills to meet a required wattage for running a refrigerator.
When securing panels onto canvas, it's important to ensure that the panels are secured with velcro or zippers, and the canvas is protected for chafe. Some boaters have used rare earth magnets to secure solar panels on canvas, but having heard of multiple failures during high wind events, we believe it is not a worthwhile installation method.
Deck Mounted Panels
Since semi-flexible panels can be walked on, another great area to consider is on your deck. When choosing semi-flexible panels for this application, we often recommend panels that are textured and have underside mounted diode boxes. These panels allow for an installation with no additional extrusions that can jam a toe or cause a trip, and allow for the wires to not be present on deck. These panels do require routing into the deck to make space for the diode box and wires, and as they are adhered with marine sealant, we recommend opting for a premium solar panel to ensure maximum lifespan.
Rigid panels can additionally be deck mounted, and on powerboats with a large amount of additional real estate, can be a great option due to their cost and lifespan. Rigid panels require mounting feet to secure to the deck, in addition to cable clams for waterproof cable pass thru. This option is best reserved for large unobstructed hardtops, or anywhere that does not require foot traffic and has the space for a 400 watt plus sized panel.
Davits/Arches
Typically reserved for sailboats, davits and arches are a great location to install rigid panels. Although this type of installation will affect the lines and aesthetics of your boat, it will provide a premium location with low risks of shading. We have also found that this option also provides an added benefit of protecting your dinghy from the sun while not in use, as well as potentially providing shade to the cockpit.
If you're planning to install solar on your davits, be sure to take in mind the panel height when using your stern ladder, in addition to the strength of your stern pulpit, as they often need additional reinforcing to handle the additional load.
Lifelines Wing Mounts
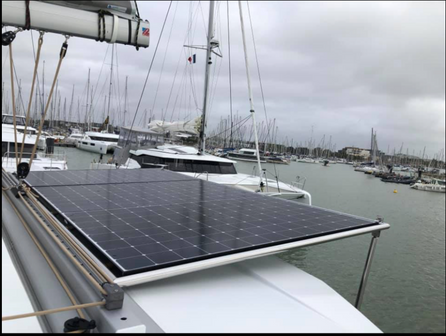
Typically reserved for sailboats, mounting solar panels on your lifeline is a great option when trying to optimize every last inch for maximum solar output. This method typically involves installing a stainless rail between stanchions, with a rigid panel generally being selected.
For boaters looking for a lighter option to rigid mounting styles, a company called Lightleaf manufactures a semi-flexible panel that is stabilized with carbon fiber that provides a great alternative.
SEA & LAND YACHT WORKS Installations: Solar Panel Mounting Ideas







Comments